How to Apply Under-Lashes and Inner Corner Eyelash Extensions
Under-lashing and inner corner lash extensions are often the most challenging parts of any appointment. Many lash artists avoid these areas because they require careful precision and technique. New methods have made these difficult spots much more manageable to work with. When done correctly, your natural eyelash extensions will create beautiful, seamless results that clients love.
What is Under-Lashing?
Under-lashing involves lash professionals attaching eyelash extensions to lash bases underneath the lower lash line. Under-lashing is a technique that involves using shorter, lighter lash extensions that blend with the upper lash set nicely. It is a process that requires meticulous work because lower lash bases tend to be thinner and fewer compared to upper lash bases.
Benefits of Under-Lashing
Under-lashing provides clear advantages that improve the look and effect of any eyelash extension service.
- Makes the eyes look bigger and more open by adding definition to the lower lash line
- Creates a balanced, complete eye appearance instead of only focusing on the upper lashes
- Gives a natural look similar to wearing mascara on both upper and lower natural eyelashes
- Adds depth to the eye area for a more finished, polished appearance
- Helps clients skip lower lash makeup since the extensions already define this area
- Keeps the overall lash look fresh longer as upper lash extensions naturally fall out over time
Challenges with Under-Lashing
Under-lashing presents several difficulties that require extra skill and patience from lash professionals.
- Lower lashes are much shorter and finer than upper lashes, making them harder to work with.
- The workspace is cramped and difficult to see clearly during application.
- Natural lower lashes grow in different directions, making isolation tricky.
- Clients may tear more during lower lash work, which affects adhesive bonding.
- Extensions on lower lashes don't last as long due to constant eye movement and touching.
- Getting the right angle is harder since improper placement can poke the eye or look unnatural.
How to Apply Under-Lashes: Step-by-Step Guide
Step 1: Preparing Your Client
Get your client set up to be relaxed with their chin up slightly to enable easy access to the lower lash line. Set up gel pads or eye patches near their eyes to guard their skin and to have a smooth area to service yourself. Be certain to have good lighting and magnification because lower lashes are much thinner and shorter than upper lids and will be more difficult to distinguish.
Step 2: Isolate Each Natural Eyelash
Gently grasp one natural lower lash with curved isolation tweezers off to one side from its neighbors. Position your tweezers slightly downward with a scooping action to pull away a lash to be plucked. Lower lashes grow much closer together than upper lashes, and because they're so delicate, this step is very time-consuming.
Step 3: Joining the Extension
Hold a shorter extension with your application tweezers - one that is 2-4mm shorter than your natural lash being applied. Dipping only the base into an infinitesimal amount of glue, place it onto the natural lash with a space of about 0.5-1mm away from your skin. Press down firmly for 2-3 seconds to let the bond set, then release it.
Step 4: Travel Along the Lash Line
Take a glance at your extension that you've just applied to make sure it's in a good position and is not contacting neighboring lashes. Work your way slowly down to lower lash line from outer to inner corner. Do one complete eye before starting with second to make sure that your technique is even.
Step 5: Verify Your Final Answers
Gently sweep with a new spoolie brush to loosen up and separate any lashes that tangled together during application. Verify to confirm that each one of the extensions is properly set and is headed in the same natural growth direction as lower lashes grow.
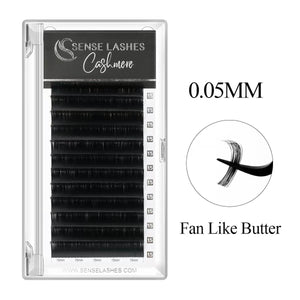
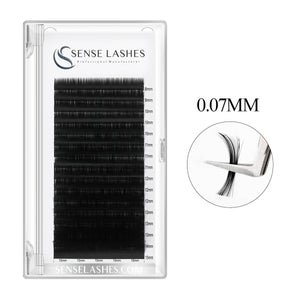
0.05MM カシミヤ プレミアム メガボリューム アイラッシュ エクステンション
カール: C
長さ: Mix8-15mm
What is Inner Corner Lash Application?
Inner corner lash application involves placing eyelash extensions on the shortest natural lashes located at the inner corner of the eye, closest to the nose bridge. This technique requires precise placement of very small extensions that blend seamlessly with the existing lash line to create a complete, natural-looking enhancement.
Benefits of Inner Corner Application
- Inner corner extensions fill gaps in the lash line for a complete look.
- This technique makes eyes look bigger and more open.
- Inner corner work helps balance uneven eyes by adding length where needed.
- Learning this skill lets lash artists charge more for their services.
- Good application creates full coverage across the entire lash line.
- Inner corner extensions change the eye shape while keeping it natural-looking.
Challenges in Inner Corner Application
Inner corner lash application presents several technical difficulties that require specialized skills and extra patience from lash professionals.
- Natural lashes in this area are extremely short, fine, and often grow in unpredictable directions.
- Limited workspace restricts movement and visibility due to the nose bridge and eye socket shape.
- Adhesive control becomes difficult in tight spaces, which can lead to extensions sticking together or bonding to skin.
- Clients may experience increased sensitivity or tearing during application in this delicate area.
- Higher shedding rates occur due to constant eye movement and touching, resulting in shorter retention times.
- Proper angle and curl selection requires advanced skills since mistakes can poke the eye or look unnatural.
How to Apply Inner Corner Lash Extensions with Innovative Techniques
Step 1: Map the Inner Corner Area
Take a good look at how the natural lashes grow in the inner corner before you start working. Figure out which lashes can handle extensions and spot any gaps that need to be filled in. Plan out your lash lengths so they start shortest right at the inner corner and get gradually longer as you work your way out.
Step 2: Position for Maximum Visibility
Adjust how your client's head is positioned and make sure you have really bright lighting so you can see the inner corner clearly. Use a small mirror or magnification to get the best view of those tiny natural lashes. Keep your working angle the same throughout so you can maintain steady control with your hands.
Step 3: Isolate with Extra Care
Use your thinnest isolation tweezers to gently separate each natural lash in the inner corner area. Take your time with this since these lashes are packed really close together and break easily. Keep your isolation tweezers steady while you work on each individual lash.
Step 4: Apply Minimal Adhesive
Only use a tiny drop of adhesive on the extension base - too much will stick to the skin or nearby lashes. Dip the extension lightly and wipe off any extra adhesive before you place it. Work fast but carefully because there's not much room to fix mistakes in this tight space.
Step 5: Place Extensions at Proper Angles
Attach each extension so it follows the natural direction the inner corner lashes grow. Keep extensions really close to the lash line but don't let them touch the skin. Make sure each extension angles slightly outward instead of pointing straight ahead so they don't poke the eye.
Step 6: Check and Secure Each Application
Hold each extension in place for 3-4 seconds so it bonds properly before you move on to the next lash. Use a clean micro brush to gently test that the extensions are stuck on tight and aren't sticking to the lashes next to them. Finish the whole inner corner area before you start working on other parts of the eye.
What Tools and Products Work Best for Effective Application?
Specialized Tweezers and Brushes
The right tweezers and brushes make under-lashing and inner corner application much more precise and successful for consistent results.
| Tool Type | Purpose | Key Benefits |
| Curved Isolation Tweezers | Separate lower lashes | Follow eye shape, better visibility |
| Fine-Tip Application Tweezers | Handle short extensions | Precise grip, won't drop extensions |
| Micro Brushes | Clean up mistakes | Remove excess adhesive, separate stuck lashes |
| Spoolie Brushes | Final quality check | Gently separate completed extensions |
Quality tweezers maintain proper tension and won't slip when working in tight spaces around the eye. Keep your tools sharp and clean since working in delicate areas requires precise control and accuracy. Regular cleaning during application prevents adhesive buildup that can affect your precision and grip.
Lash Serums and Conditioners for Healthy Extensions
Quality lash serums and conditioners strengthen natural eyelashes, creating a better foundation for extension application and improved retention rates.
| Product Type | Key Features | Benefits |
| Peptide-Rich Serums | Contains peptides and vitamins | Nourishes lashes without affecting adhesive |
| Oil-Free Formulas | No oils or greasy ingredients | Won't break down extension adhesive |
| Growth-Enhancing Serums | Active growth ingredients | Creates more natural lashes for future sets |
| Compatible Conditioners | Works with your adhesive brand | Prevents retention issues and complaints |
Clients should apply these treatments to clean lashes before bed, avoiding direct contact with extension bonds. Regular use helps natural lashes stay strong enough to properly support extensions while some formulas promote new lash growth. Always recommend products that are compatible with your specific adhesive brand to avoid retention problems.
カール: C
長さ: ミックス 8-15MM
Aftercare for Under-Lashed and Inner Corner Lashes
Proper aftercare is essential for under-lashed and inner corner extensions since these areas experience more movement and touching throughout the day.
- Gentle Cleaning Routine: Use oil-free lash cleanser and a soft brush to clean extensions daily, paying extra attention to the lower lash line where makeup and debris collect.
- Avoid Rubbing or Touching: Remind clients not to rub their eyes or touch the extensions, especially in the inner corner area where natural oils from fingers can break down adhesive.
- Sleep Position Awareness: Encourage clients to sleep on their back or use a silk pillowcase to reduce friction that can cause premature shedding of delicate lower extensions.
- Eye Makeup Removal: Remove eye makeup carefully using downward motions on upper lashes and upward motions on lower lashes to avoid pulling extensions in the wrong direction.
- Regular Maintenance Appointments: Schedule fill appointments every 2-3 weeks since under-lashes and inner corner extensions typically shed faster due to natural eye movement.
- Avoid Oil-Based Products: Keep all skincare and makeup products around the eye area oil-free to prevent adhesive breakdown and maintain strong bonds.
- Gentle Brushing Technique: Use a clean spoolie brush daily to separate lashes and maintain their shape, working in the natural growth direction of each area.
- Protection from Heat and Steam: Limit exposure to saunas, steam rooms, and hot showers for the first 24-48 hours after application to allow proper adhesive curing.
Perfect Your Under-Lashing and Inner Corner Lash Extensions Today
Under-lashing and inner corner eyelash extensions might seem tricky at first, but they're game-changers for your business. These techniques create the natural, polished look that keeps clients coming back for more. Start practicing these methods during your slower appointments to build confidence. Your lash extension work will stand out from competitors once you master these skills.


コメントを残す