How to Combine Lash Tinting with Lash Extension for Perfect Custom Looks
Clients always ask for extensions that look "completely natural" - but that's harder than it sounds. Adding tinting to your eyelash extension service changes everything. You'll get perfect natural looking eyelash extensions every single time. The before and after photos will become your best marketing tool.
What is Lash Tinting?
Lash tinting is a semi-permanent coloring treatment that darkens natural eyelashes using safe, specially formulated dyes. The process takes about 10-15 minutes and involves applying tint to clean lashes, letting it develop, then removing it to reveal darker, more defined lashes. Unlike mascara, tinting colors each lash from root to tip and lasts 4-6 weeks without smudging or flaking. This treatment is perfect for clients with light or sparse lashes who want more definition, and it works especially well as a base for extension applications.
What Are Lash Extensions?
Lash extensions are individual synthetic, silk, or mink fibers that get glued to each natural lash using professional adhesive. Each extension is carefully applied one by one to create length, volume, and curl that lasts 3-4 weeks. Extensions come in different lengths, thicknesses, and curl patterns, allowing lash artists to customize the look for each client. The process typically takes 1-2 hours for a full set and gives clients the appearance of naturally long, thick lashes without needing mascara or other makeup.
Extensions de cils faciles à ventiler de 0,03 mm
BOUCLE: C
LONGUEUR: 8MM
Why Combine Lash Tinting with Extensions
Better Blending and Fuller Look
Tinting makes extensions look natural instead of fake. Without tinting, you can see where fake lashes meet natural ones. With tinting, everything blends together so clients get natural looking eyelash extensions.
Clients Save Time Every Morning
Clients skip mascara completely and save 10 minutes every morning. They wake up with perfect lashes and stay booked for regular appointments.
More Ways to Match Each Client
Tinting lets you match colors to each person. Blondes need brown tint, brunettes need black tint. This creates eye lashes extension looks that suit each client.
Extensions Last Longer
Tinted lashes mean no daily mascara, so less eye rubbing. Less touching makes extensions stay on longer. Clients get more weeks from each appointment and better eyelash extensions before and after results.
Covers Gaps Better
Tinted natural lashes hide small gaps between extensions. Dark natural lashes keep the lash line looking full even when extensions fall out. Clients never see bare spots.
Who Should Consider Lash Tinting with Extensions?
Ideal Candidates
Certain clients get the best results from combining lash tinting with extensions, making it worth recommending this service combination.
- Clients with light or blonde natural lashes who want natural looking eyelash extensions
- Busy professionals who want to skip daily eye makeup routines
- People with sparse or thin lashes where gaps usually show through extensions
- Glasses wearers who need better lash definition that shows through lenses
- Active clients who swim, exercise, or need low-maintenance eye lashes extension looks
- Anyone wanting extensions that photograph well for social media or headshots
- Clients whose previous extensions looked fake or gappy as they shed
Precautions and Contraindications
Don't offer this service to clients who have:
1. Extremely sensitive eyes or severe allergies to hair dye
2. Active eye infections, styes, or eye area irritation
3. Pregnancy or nursing status due to hormonal sensitivity
4. Blood-thinning medications or recent eye surgery
5. Daily contact lens wear (remove 24 hours before service)
6. Eczema, psoriasis, or skin conditions around eyes
7. Age under 16 years old
8. History of severe reactions to cosmetic chemicals
Always do patch tests 48 hours before appointments for clients with any sensitivities, even if they say it's not necessary.
Tools and Products for Best Results
Recommended Tints and Extensions
Choosing the right products is essential for creating professional natural looking eyelash extensions that clients will love.
Best Tint Types:
| Tint Quality | Why It Works | Best For |
| Professional grade with consistent colors | Reliable color consistency, multiple shades available | Beginners who need predictable results |
| Gentle, ammonia-free formulas | Gentle formula, lasts 4-6 weeks without fading | Clients with sensitive eyes |
| High-pigment, photographer-friendly tints | Rich, intense colors that photograph well | Social media clients who need camera-ready lashes |
Top Extension Choices:
| Extension Type | Thickness | Best Use |
| Silk | 0.15mm | Natural everyday looks |
| Korean PBT | 0.18mm | Clients wanting more definition |
| Mink | 0.15-0.20mm | Premium natural appearance |
These extension materials hold adhesive well on tinted lashes and maintain their shape throughout the entire wear period.
Professional Tools for Safe Application
The right tools make your job easier and ensure consistent eyelash extension results every time.
Essential Tinting Setup:
| Tool | Purpose | Why It Matters |
| Disposable mascara wands | Precise tint application | Prevents cross-contamination between clients |
| High-quality eye pads | Protect lower lashes | Stay in place during entire process |
| Glass mixing dishes | Mix tint properly | Won't react with tint chemicals |
| Cotton pads & Q-tips | Clean removal | Remove all residue without leaving fibers |
Extension Application Must-Haves:
| Equipment | Specification | Benefit |
| Precision tweezers | Perfect alignment | Smooth pickup, no wasted product |
| Medical-grade adhesive | Designed for tinted lashes | Better bonding on chemically treated lashes |
| Professional lighting | 1000+ lumens | See every detail clearly |
| Magnifying equipment | 2x-3x magnification | Perfect color matching and placement |
Investing in quality tools pays off with better eyelash extensions before and after results and happier clients who return regularly.
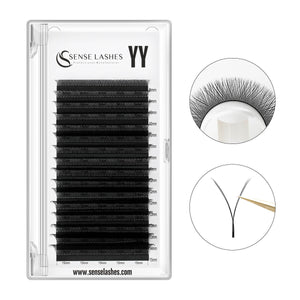
Extensions de cils volume YY 0,05MM
Épaisseur: 0.05
BOUCLE: C
LONGUEUR: MIXTE 8-15MM
How to Prepare for Lash Tinting and Extension Application
Check the Client's Skin and Lashes First
Look closely at your client's natural lashes and eye area under bright light. Check for any redness, cuts, or irritation that would make the service unsafe. Make sure their natural lashes are healthy and strong enough to support extensions. Ask about eye allergies, recent eye treatments, or any medications they're taking that might affect the service.
Always Do a Patch Test
Put a tiny amount of tint on their inner wrist or behind their ear 24-48 hours before their appointment. This prevents bad reactions like swelling or redness during the actual service. Do this test every time, even for clients you've seen before, because allergies can start at any time. Write down the test results in their client record.
Pick the Right Tint Color
Match the tint to your client's hair and skin color for natural looking eyelash extensions. Use black or dark brown for brunettes, and medium to dark brown for blondes. Ask if they want a natural or dramatic look - subtle clients need lighter tints while bold clients can handle darker shades.
Choose Extension Length and Curl
Measure their natural lashes first, then pick extensions 2-3mm longer for natural looks or up to 5mm longer for drama. Match their natural curl or go one level curlier - straight lashes need C or D curl, while curly lashes work with B or C curl. Plan different lengths for different eye areas to create the best shape.
Get Your Workspace Ready
Set up all your tools, tints, extensions, and glue before the client comes in. Check that your lighting is bright enough to see every detail clearly. Have eye pads, brushes, and tint remover within easy reach. Clean everything and make sure your tint is fresh and your adhesive hasn't expired for the best eyelash extension results.
How to Do Lash Tinting Before Extensions
The tinting process requires careful preparation and timing to get the best results before applying extensions.
Clean Lashes Thoroughly First
Start by cleaning your client's lashes with oil-free cleanser to remove any makeup, oils, or residue that could block color absorption. Use a lint-free applicator to gently clean each lash from root to tip, focusing on the lash line where mascara builds up. Even small amounts of oil or makeup will prevent the tint from sticking evenly and cause patchy results that look unprofessional.
Protect the Eye Area Properly
Place protective eye pads under the lower lashes and put a thin layer of petroleum jelly around the eye area to prevent skin staining. Make sure the eye pads sit tight against the lower lash line without pushing up the upper lashes, and cover all skin areas where tint might accidentally touch. Tint stains skin right away and is hard to remove, so this protection step is important.
Mix and Apply Tint Evenly
Mix your tint following the package directions and apply it evenly to the upper lashes using a small disposable brush. Work with small amounts to keep control, and get a new applicator if yours gets too messy or clumpy. Apply the tint smoothly and evenly so all lashes get the same amount of color.
Cover Every Lash Completely
Cover every lash from root to tip, working fast since the tint starts working as soon as it touches the lashes. Start at the inner corner and work outward, then go back to catch any spots you missed. Make sure to get the underside of lashes too, and separate any that stick together so all lashes get covered properly for natural looking eyelash extensions.
Time the Processing Carefully
Let the tint sit for 10-15 minutes depending on how dark you want it, checking the color every few minutes. Light brown usually needs 8-10 minutes, while deep black might need the full 15 minutes. Use a timer instead of guessing because tint that doesn't sit long enough fades fast, and tint that sits too long can hurt the lashes.
Remove All Residue Completely
Remove all tint with damp cotton pads, making sure no product is left on the lashes or skin. Use gentle downward strokes without pulling on the lashes, and keep going until your cotton pad stays clean. Any leftover tint will mess with your extension glue and make extensions fall off sooner.
How to Make Lash Tinting Last Longer
Proper preparation and timing are essential for tint that stays vibrant throughout the extension wear period.
- Clean the lashes thoroughly before tinting because any oils or makeup residue will prevent the color from absorbing properly.
- Don't rush the processing time since undertimed tint fades quickly and can look uneven or patchy.
- Remove every bit of tint product because leftover chemicals can interfere with extension adhesive and cause poor retention.
- Wait at least 10 minutes after removing tint before starting extensions to let the lashes settle and dry completely.
How to Apply Extensions After Tinting
Tinted lashes give you more options to create custom looks that work well with the darker base color.
Create Natural Depth with Color Mixing
Mix different extension colors like dark brown and black to create natural depth on clients with brown-tinted lashes. Use about 70% of your main color and 30% of the second color, spreading them randomly across the lash line instead of putting them in separate areas. This looks like the natural color differences you see in real lashes and prevents that fake, uniform look.
Maximize Drama with Matching Colors
Use all black extensions on black-tinted lashes for clients who want bold, dramatic results. The matching colors create a smooth, striking look that shows up great in photos and gives clients the high-impact eye lashes extension results they want. This combination works really well for evening looks, special events, or clients who like dramatic makeup.
Enhance Outer Corners for Shape
Try longer extensions on the outer corners since the dark tinted base makes dramatic eyelash extension styles look more natural. Start with your normal length on the inner third, go 1-2mm longer in the middle, and use 3-4mm longer extensions on the outer third for a nice cat-eye shape. The tinted base makes this length change look natural instead of obviously fake.
Balance Thickness with Tinted Base
Consider using slightly thicker extensions since the tinted base can handle more weight and still look natural. The darker lash line can support 0.18mm or even 0.20mm thickness without looking too heavy or fake. This lets you create more dramatic eyelash extensions before and after changes while keeping the natural look clients ask for.
How to Keep Lashes Healthy and Extensions Secure
The tinting process changes how extensions adhere, so you need to adjust your application technique accordingly.
- Make sure tinted lashes are completely dry before applying any adhesive because moisture causes weak bonding and quick extension loss.
- Use slightly less adhesive than usual since tinted lashes can be more slippery and don't need as much product for secure attachment.
- Work in smaller sections and let each area dry completely before moving to the next to ensure strong adhesion throughout.
- Check your eyelash extensions before and after results regularly to catch any retention problems early and modify your technique as needed.
How to Customize the Look with Tinting and Extensions
Color Blending Techniques
Mixing extension colors makes the final look more natural than using just one shade. For brown-tinted lashes, use mostly black extensions with some dark brown pieces mixed in for realistic color variation. With black-tinted lashes, stick to black extensions but add a few dark brown ones in the inner corners to soften the look.
Spread different colors throughout each eye instead of putting them in separate sections, which looks obvious. Place darker extensions near the lash line and lighter ones toward the tips for natural dimension. Test color combinations on a practice strip before using them on clients to make sure they work well together.
Matching Extensions to Natural Lash Tint
Choose extension colors that work with your tint choice for natural looking eyelash extensions. Blonde clients need medium brown extensions with light brown tint for subtle results. Brunette clients look best with dark brown extensions and dark brown tint for natural enhancement. For bold looks, use black extensions with black tint.
Check your client's eyebrow color when picking extension shades since everything should work together. Extensions usually look lighter than tinted natural lashes, so pick one shade darker than you think you need for the best eyelash extension results.
Tips for Bolder or Subtle Looks
Adjusting your technique based on the desired intensity helps you nail the perfect look every time.
For subtle, natural looks:
- Use brown tint with brown or dark brown extensions that are only 2-3mm longer than natural lashes.
- Stick to C curl extensions that enhance the natural curve without looking too dramatic.
- Focus most of the length in the center of the eye rather than creating a cat-eye effect.
For bolder, dramatic looks:
- Choose black tint with black extensions that are 4-5mm longer than natural lashes for maximum impact.
- Mix D curl extensions throughout for extra lift and definition that photographs beautifully.
- Create a cat-eye shape by using longer extensions on the outer third of each eye for that Instagram-worthy eyelash extension effect.
- Consider volume techniques with multiple thin extensions per natural lash to maximize the dramatic eyelash extensions before and after difference.
Create Amazing Natural Looking Eyelash Extensions Every Time
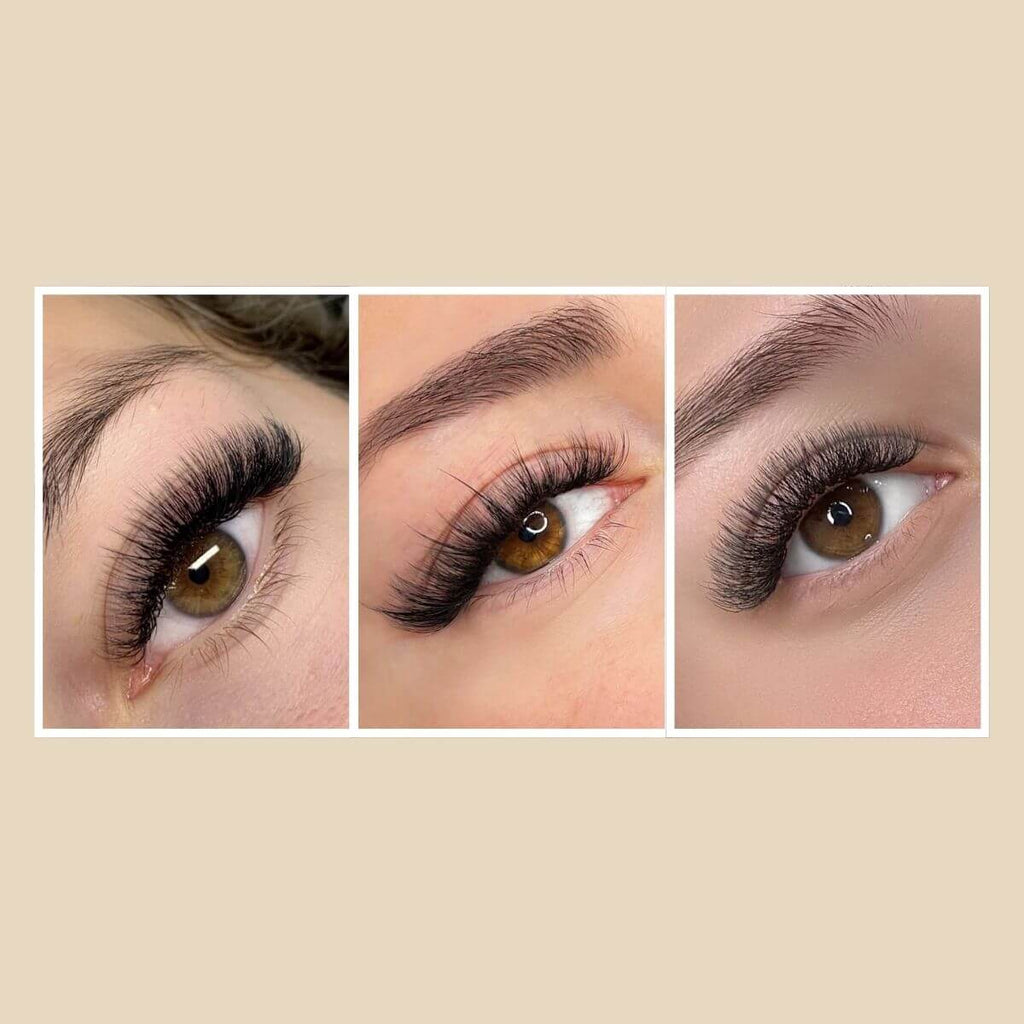
The combination of tinting and extensions delivers the natural looking eyelash extensions that clients really want. This technique solves the biggest problem with regular eye lashes extension services - that obvious fake look nobody likes. Your eyelash extensions before and after gallery will be filled with stunning transformations that book more appointments. Add this service combination to your offerings and give clients the natural, gorgeous lashes they've been asking for.


Laissez un commentaire