How to Use Eyelash Glue and Foam Cleanser: Complete Step-by-Step Guide
Think your eyelash glue technique is on point? Many lash artists believe they've mastered application, yet still struggle with retention issues and client complaints. The truth is, most problems stem from small mistakes in how we apply eyelash glue or how we educate clients about foam cleanser use. Your technique might look perfect, but if you're missing these key steps, you're setting yourself and your clients up for disappointment. When you get both products working together correctly, you'll notice the difference in your work immediately.
What Makes Eyelash Glue Work for Professional Applications?
Different Glue Types and How Long They Last
Choosing the right eyelash glue type determines your client's comfort, retention, and overall satisfaction with their lash service.
| Glue Type | Hold Duration | Best For | Base Formula |
| Strip Lash Glue | 8-12 hours | Daily wear, temporary looks | Latex or acrylate |
| Semi-Permanent Glue | 2-4 weeks | Professional extensions | Cyanoacrylate |
| Individual Lash Glue | 3-7 days | Cluster applications | Modified acrylate |
| Medical-Grade Adhesive | 4-6 weeks | Salon extensions, sensitive clients | Pure cyanoacrylate |
Clear vs. Dark Glue
The color choice between clear and dark eyelash glue affects both the final appearance and your application technique.
- Clear glue dries completely transparent, making it perfect for natural daytime looks and clients who prefer subtle enhancement. It works exceptionally well with blonde or light brown extensions but can appear slightly glossy under bright lights.
- Dark glue comes in black or deep brown shades that naturally blend with the lash line, creating a more dramatic effect. Professional lash artists often prefer dark formulas because they camouflage any visible adhesive mistakes and make lashes appear fuller.
- Application differences include longer working time with clear glues (allowing repositioning) while dark glues typically set faster, requiring more precise initial placement.
Sensitive Skin Formulas
Special formulations cater to clients with reactive skin or previous adhesive sensitivities.
- Reduced irritant levels mean these glues contain lower concentrations of formaldehyde and other potential allergens that commonly cause redness or swelling around the eye area.
- Soothing additives like aloe vera extract, chamomile, or vitamin E help calm skin during application and reduce post-service inflammation.
- Alternative bonding agents such as polyacrylate replace traditional cyanoacrylate in ultra-sensitive formulas, though they may offer 10-20% less holding power than standard adhesives.
What's Actually in the Glue and Why It Matters
Understanding adhesive ingredients helps you select the right product for each client's skin type and desired results.
| Ingredient | Function | Found In | Client Impact |
| Cyanoacrylate | Primary bonding agent | Most professional glues | Strong, flexible hold |
| Carbon Black | Dark pigmentation | Black/brown glues | Natural lash line blend |
| Titanium Dioxide | Transparency maintenance | Clear glues | Invisible finish |
| Hydroquinone | Stabilizer | All formulas | Prevents premature curing |
| Polymethyl Methacrylate | Flexibility enhancer | Long-wear formulas | Crack-resistant bond |
| Formaldehyde | Preservative | Standard formulas | Extended shelf life |
Once you really get how each formula works and what all those ingredients do, you can easily tell clients which option will work best for them. This kind of expertise is what makes clients trust you and keeps them coming back instead of trying someone else.
How to Apply Eyelash Glue for Professional Results
Preparing Your Eyelashes
Prepping your client's natural lashes is what makes or breaks your whole application, so do not skip over this step.
- Clean the lash line thoroughly with an oil-free lash shampoo or cleanser to eliminate makeup, oils, or residue that can interfere with proper bonding. Even tiny amounts of mascara or skincare products will cause adhesion problems later.
- Prime the natural lashes using a lash primer specifically made for extensions, which provides the perfect pH balance and eliminates any excess moisture that may disrupt the adhesive.
- Separate each natural lash using your tweezers to carefully open up any clumped lashes. This will keep multiple extensions from adhering to one natural lash, causing discomfort and premature shedding.
- Evaluate lash health by examining each natural lash for damage, weakness, or abnormal shedding patterns. Skip placing extensions on damaged lashes that can't support the additional weight.
Applying the Glue
The way you glue your extensions determines how well they stick to the skin and how comfortable your client is throughout the service.
- Take the right amount by submerging your extension into the glue drop so that about 1-2mm of the base is coated. Too little glue leads to weak retention, while too much leads to messy bonds and potential irritation.
- Work within the open time, which is usually 2-3 seconds for most professional adhesives before they start to set. Have your extension prepared and ready before applying the adhesive.
- Maintain the correct glue consistency by replacing your glue drop every 15-20 minutes, as it thickens and gets harder to work with when it comes in contact with air.
- Keep the environment under control with 45-65% humidity and a temperature of 68-72°F, since these settings make the glue cure at the correct speed.
Tips for Even Application
Getting consistent glue coverage on every single extension takes practice, but these techniques will help you get there faster.
| Technique | Purpose | How To Do It | Common Mistake |
| Glue Drop Size | Controls amount used | Make drops about 1-2mm diameter | Making drops too big |
| Extension Angle | Even coating | Dip at 45-degree angle | Straight up-and-down dipping |
| Rolling Motion | Complete coverage | Gently roll extension in glue | Just touching the surface |
| Speed Control | Consistent application | Same rhythm for each lash | Rushing through some lashes |
Attaching the Lashes
The final attachment is where your skill really comes through, and minor adjustments here produce enormous differences in the end product.
- Position at the right distance by placing the extension 0.5-1mm from the skin, never on the eyelid. This will avoid irritation and allow natural lash growth without pulling.
- Apply appropriate pressure by lightly pressing the extension onto the natural lash for 2-3 seconds to achieve good contact. Do not squeeze too tightly, as this can harm the natural lash or cause a painful bond.
- Check the bond immediately by making sure it's flat against the natural lash with no gaps or twisted angles that can lead to premature lifting.
- Work systematically by completing one eye fully before moving to the other, or work back and forth in sections to ensure even application and prevent glue from setting before you're ready.
What Should Lash Artists Know About Foam Cleanser?
What Is Foam Cleanser?

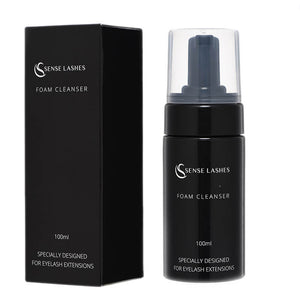
is a mild cleansing product that forms a light, airy lather for the delicate eye area. As opposed to normal face washes that contain oils or strong detergents, lash-friendly foam cleansers cleanse around extensions without breaking adhesive bonds or aggravating sensitive skin.
These cleansers loosen dirt, leftover makeup, and natural oils from the lash line without breaking down the adhesive that holds extensions in place. They are available in automatic foaming pump bottles, making them easy for clients to use at home. The foamy consistency allows for a gentle application that won't tug on extensions or twist them.
Good lash foam cleansers have a pH level of 6.5-7.5, which is similar to natural skin pH to ensure no irritation with daily use.
Benefits of Using Foam Cleanser
Teaching your clients how to properly use foam cleanser is one of the simplest ways to optimize retention and maintain healthy, natural lashes between appointments.
- Extends wear by removing oils and residue that naturally occur along the lash line and can break down adhesive bonds over time. Daily cleansers typically get 1-2 weeks longer wear out of their sets.
- Prevents the accumulation of bacteria in the area of the eye, minimizing the chances of styes, infections, and other eye problems that compel clients to have their extensions removed prematurely.
- Maintains natural lash health by keeping follicles clean and free of clogged pores that disturb the natural growth cycle and cause premature shedding.
- Reduces irritation and sensitivity caused by accumulated makeup, skincare products, and environmental impurities settling in the lash area throughout the day.
- Better fill appointments as clean lashes allow for better adhesion when applying new extensions, and you spend less time cleaning prior to the start of the service.

How Should Clients Use Foam Cleanser to Protect Their Lashes?
Preparing Your Face
Getting the face ready for foam cleanser use sets up your clients for success and prevents damage to their extensions.
- Remove all makeup first using oil-free makeup remover or micellar water on areas away from the lashes. Never use makeup wipes directly on lash extensions, as the friction can cause twisting and premature shedding.
- Wash hands thoroughly with soap and water to remove any oils, lotions, or dirt that could transfer to the clean lash area and interfere with extension longevity.
- Remove contact lenses if wearing them, since foam cleanser can sometimes create temporary blurriness that makes lens removal difficult afterward.
- Tie back hair to keep it away from the face and prevent hair products from getting near the freshly cleaned lash area during the cleansing process.
- Work over a clean sink with good lighting so you can see what you're doing and avoid accidentally rubbing or pressing too hard on the extensions.
Applying the Foam Cleanser
The way clients apply foam cleanser directly impacts how long their extensions last and how healthy their natural lashes stay.
- Use the right amount by dispensing 1-2 pumps of foam cleanser into clean, dry hands. Too much product makes rinsing difficult, while too little won't clean effectively.
- Apply to closed eyes by gently dabbing the foam onto the eyelids and lash line with fingertips, never rubbing or scrubbing motions that could damage extensions.
- Work from outer to inner corner using light tapping motions to distribute the cleanser evenly across the entire lash line and eyelid area.
- Let it sit briefly for 10-15 seconds to allow the foam to break down oils and buildup without needing aggressive rubbing that could harm the extensions.
- Focus on the lash line where most buildup occurs, but avoid getting excessive product directly on the extension bonds themselves.
Proper Techniques for Cleansing
Teaching clients the right cleansing technique prevents most of the damage that shortens extension lifespan.
| Technique | What To Do | What To Avoid | Why It Matters |
| Finger Movement | Light tapping and patting motions | Rubbing, scrubbing, or circular motions | Prevents extensions from twisting or loosening |
| Pressure Level | Gentle contact, like touching a soap bubble | Pressing firmly or massaging | Protects adhesive bonds from breaking |
| Direction | Downward strokes following lash growth | Side-to-side or upward motions | Maintains lash alignment and prevents tangling |
| Rinse Method | Cool water splashed gently | Hot water or direct water pressure | Prevents adhesive from softening or weakening |
- During cleansing, clients should keep their eyes closed and work systematically across each eye. The foam should do most of the work - if they need to scrub or rub to get clean, they're either using the wrong product or have buildup that requires professional attention.
- Rinsing properly means using lukewarm water and cupping hands to gently splash water over the closed eyes multiple times. Never put the face directly under running water or use washcloths, which can catch on extensions and pull them out.
- Drying technique is just as important as cleaning. Clients should gently pat the eye area with a clean, lint-free towel, then use a clean spoolie brush to gently separate any lashes that might have gotten stuck together during cleansing.
When clients follow proper foam cleanser techniques consistently, you'll see the difference immediately at their fill appointments. Their extensions will look cleaner, their natural lashes will be healthier, and you'll spend less time removing buildup before applying new lashes.
What Are the Essential Eyelash Care Practices Every Lash Artist Should Know?
Removing Eyelash Extensions Safely
Safe removal protects your client's natural lashes and keeps them coming back, so don't rush this process.
- Use professional cream remover designed for lash adhesives. Apply with micro brushes and wait 10-15 minutes for the glue to fully dissolve before attempting removal.
- Work in small sections from outer to inner corner, using gentle sliding motions with tweezers. Never pull or tug on extensions that aren't releasing easily.
- Clean thoroughly after removal with oil-free cleanser to remove all product residue and check for any damage to natural lashes.
| Removal Method | Safety Level | Time Required |
| Professional Cream Remover | Safest | 15-20 minutes |
| Gel Remover | Safe | 10-15 minutes |
| Oil-based removers | Risky | 20-30 minutes |
| DIY methods | Dangerous | Never use |
Maintaining Healthy Natural Lashes
Keeping natural lashes healthy ensures clients can wear extensions long-term without damage.
- Teach about normal shedding - losing 3-5 natural lashes a day is totally normal and a part of the natural growth cycle.
- Schedule appointments accordingly, with 2-3 weeks in between services to allow natural lashes to finish their growth cycle without continuous weight.
- Look out for warning signs such as excessive loss (10+ lashes a day), thinning, brittleness, or irritation that necessitates a break from extensions.
- Teach daily care basics, including gentle foam cleanser use, avoiding oils, and sleeping on silk pillowcases to reduce friction.
- Prescribe good-quality lash serums containing peptides or biotin that promote growth without interfering with adhesion. Prostaglandin serums should be avoided for frequent extension wearers.
Healthy lashes are uniform in thickness, naturally flexible, and regrow normally after regular shedding. Signs of trouble are breakage, abnormal thinning, or any follicle inflammation requiring prompt attention.
Prioritizing natural lash health encourages client loyalty and differentiates you from techs who are just about short-term results. Clients feel safer in your hands when they realize you're looking out for their lashes in the long run, and this builds long-term relationships that are good for your business.

Get Eyelash Glue and Foam Cleanser Techniques Right Every Time
Getting really good with eyelash glue application and foam cleanser education is honestly what makes or breaks your lash business. Clients can tell the difference when you know what you're doing - their extensions last longer, feel more comfortable, and look amazing the whole time they're wearing them. Take the time to nail these essential techniques and teach proper aftercare to every single client who sits in your chair. When you consistently deliver great results through proper eyelash glue use and foam cleanser guidance, you'll build the kind of reputation that keeps your schedule booked solid.
8 FAQs about Eyelash Extension Application and Aftercare
Q1: How long should I wait between applying eyelash glue and attaching the extension?
Apply extension right after glue dipping - within 2-3 seconds at most. Any longer and the glue begins to set, forming weak bonds and causing poor retention.
Q2: Can clients use regular face wash instead of foam cleanser on their lash extensions?
No, most face washes contain oils, sulfates, or glycols that break down lash adhesive. Only use cleansers specifically designed for lash extensions to avoid premature shedding.
Q3: What is the optimal humidity for applying eyelash glue?
Maintain 45-65% humidity for best glue performance. Too low and the glue cures too slowly, too high and it sets too quickly for bonding.
Q4: What is the shelf life of opened eyelash glue?
The majority of professional glues will last 4-6 weeks after opening when kept in a cool, dry place. Throw away immediately if consistency changes or becomes stringy.
Q5: Should clients brush their extensions after using the foam cleanser?
Yes, gently brush with a clean spoolie once the lashes are totally dry to separate any that adhered together during cleaning and keep them in proper alignment.
Q6: Can clients swim or shower immediately after lash application?
Wait 24-48 hours before wetting extensions to let the adhesive properly cure. After that, regular water exposure is okay with the correct drying method.
Q7: What temperature water should clients use when rinsing foam cleanser?
Use warm water - hot water will soften the adhesive, and cold water will not rinse well. The temperature should be comfortable on the skin.
Q8: How do I determine if a client is allergic to eyelash glue?
Symptoms are redness, swelling, itching, or burning around the eyes. Always perform patch tests 24-48 hours prior to service on clients with sensitive skin or known reactions.


Deixe um comentário