


Lash Extension Styles for Every Eye Shape: The Ultimate Mapping Guide for Lash Artists

Master lash mapping with this step-by-step guide tailored for every eye shape. Create balanced, long-lasting lash extensions clients will love.
No two clients have the same eye shape, lash direction, or styling goals—and that’s why a fixed lash map won’t deliver the best results. Applying the same length, curl, and placement every time can lead to flat or unbalanced looks that don’t complement the client’s face. Custom lash mapping allows you to enhance each person’s natural beauty while addressing specific features like hooded lids, wide-set eyes, or downward angles. For lash artists and studios aiming to elevate their styling game, knowing how to tailor lash extensions to different eye shapes is a skill worth mastering.
Why Does Lash Mapping Matter More Than You Think?
Lash mapping is one of the most important steps in any lash extension appointment. It helps you plan where to place different lengths, curls, and thicknesses to match the client's natural lashes and eye shape. Without a proper map, the final result can look uneven, feel uncomfortable, or fail to bring out the client’s best features. A custom lash map gives you a clear plan to follow—leading to better retention, smoother styling, and a more flattering finish. If you're a lash artist or running a studio, building the habit of mapping before every set can raise both client satisfaction and your professional results.

What Is Lash Mapping?
Lash mapping is a method that lash artists utilize to pre-plan where the lash extensions will be applied along the eyelid. You split the lash line into sections and then designate a certain length and curl for each section. This allows you to achieve a clean, even appearance that is appropriate for the client's eye shape and style choice. A lash mapping pattern can be designed on eye pads, Lash Mapping Stickers, or an electronic graph prior to starting the set.

In what ways do eye shape and lash direction alter the result?
Each eye shape requires a certain strategy. The round eye, for instance, will be more flattering with winged appearances, and small eyes need the middle to be lifted. Even the direction of the natural lash growth is important—some straight, some downward, some side to side. Applying the same map to every client without noticing the direction of their lash growth or shape will end up with an unbalanced appearance or heavy feeling. A custom lash map solves this by balancing out what you already possess.
Why Use a Custom Lash Map for Each Client?
Mapping with a personalized lash map enhances comfort, retention, and overall look. Extensions that go in the direction of the natural lash and are not too heavy for short or thin lashes make clients more comfortable and keep their sets on longer. Well-planned mapping also contours the eye slightly, lifting or opening up the look as required. For technicians seeking consistent results and satisfied clients, understanding how to map lash extensions correctly is essential.
Best Lash Extension Styles for Every Eye Shape
Every set of eyes is shaped a little differently, which means a one-size-fits-all lash map won’t create the same result on every client. The right lash extension style depends on more than just preference—it should take into account the eye’s width, angle, lid shape, and lash direction. Matching your lash map to your client’s eye shape helps highlight their natural beauty, correct imbalance, and build a more comfortable, longer-lasting set. Below are the most common eye shapes and how to style lash extensions for each one.
1. Small Eyes – Make Them Look Bigger and Brighter
Clients with small eyes often want to make their eyes appear more open. A Doll Eye Map works best because it places longer lashes in the center, which visually lifts and widens the eye. Use D or CC curls to add height without heaviness, and stay within a 9mm to 13mm length range based on the strength of the natural lashes. Avoid using the longest lashes on the outer corners, as this can make the eyes appear shorter and droopier.
Styling Tip: Focus your mapping between the inner third and the center of the lash line. Use lighter volume fans to prevent closing the eye further.

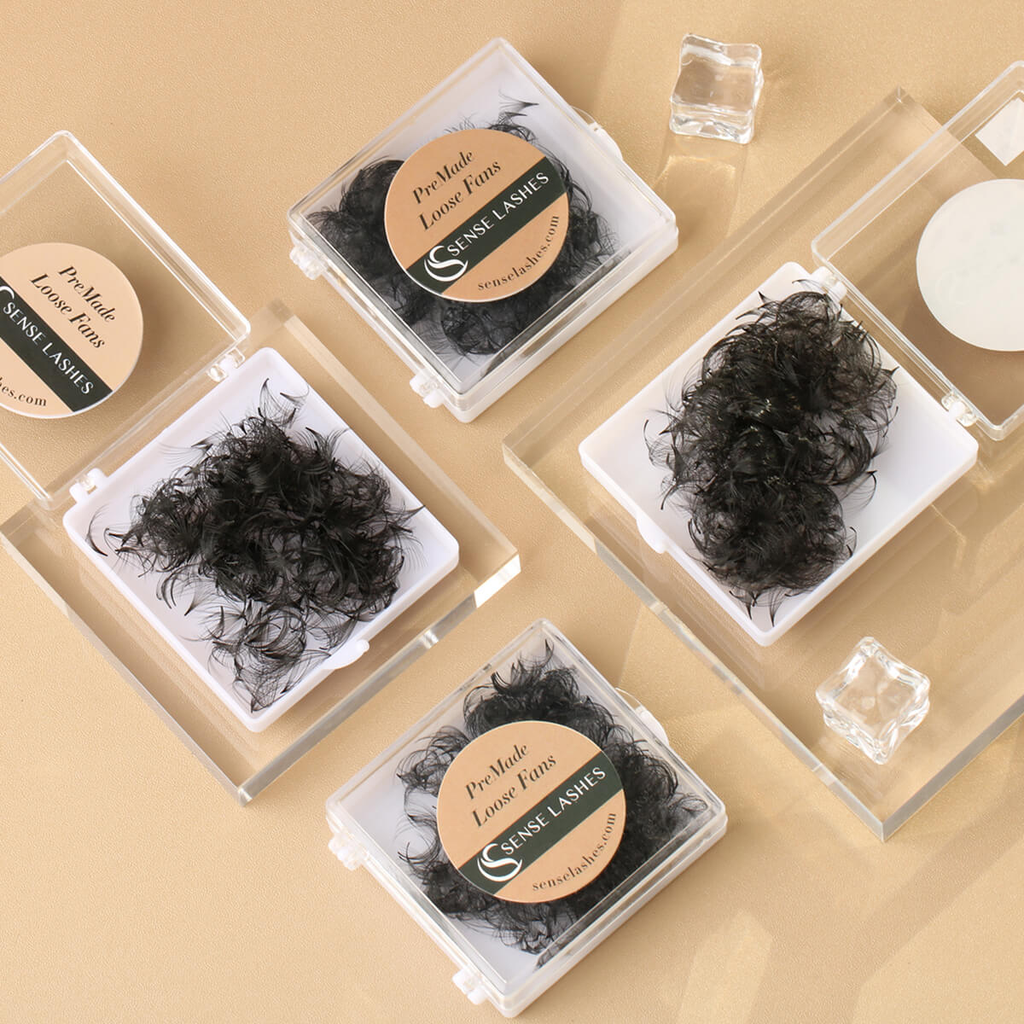
5D Loose Promade Fans - 500 Premade Volume Lashes
Thickness: 0.07
Curl: C
Length: 7mm

2. Downturned Eyes – Lift and Open the Outer Corners
For clients with downturned eyes, the goal is to create a lifted shape that draws the eyes slightly upward. Start with B or C curls in the inner and middle zones, then shift to C or D curls as you reach just before the droop. Avoid adding long lashes at the far outer corner—it can pull the eye down more. Instead, gradually build length just before the outer edge, and taper off slightly at the ends.
Styling Tip: Use a layering technique to add soft lift. Lash layering with alternating curls in the middle zone can create a more natural-looking transition.
3. Wide-Set Eyes – Bring the Focus Inward
Wide-set eyes benefit from styles that pull visual attention toward the center of the face. Skip the Cat Eye Map, as it can make the eyes look even farther apart. Choose a Reverse Cat Eye or Doll Eye Map that uses longer lashes toward the center and shorter lengths on the outer corners. This balances the proportions of the face and makes the eyes appear more centered.
Styling Tip: Try starting your longest lengths just past the pupil to avoid overextending the outer edge. Keep outer corners short and softly curled.
4. Close-Set Eyes – Stretch the Width with Strategic Length
With close-set eyes, you’ll want to extend the outer corners to add the illusion of space. A Cat Eye or Kitten Eye Map helps direct the gaze outward. Begin with short lengths at the inner corners and increase gradually toward the outer third of the lash line. Use B or C curls to keep the final look soft, especially at the ends.
Styling Tip: Avoid clustering too much volume near the inner eye—it can make the eyes feel crowded. Keep lash density light in the inner half and build volume gradually outward.

5. Deep-Set or Hooded Eyes – Avoid Over-Curling
Deep-set or hooded eyes can be sensitive to high curls. Using D or L curls can cause discomfort, as the lashes may press into the eyelid or fold. Instead, go for B or C curls, which lift the lashes gently without pushing back. Place longer lashes just past the center of the eye to lift the lash line without interfering with the lid fold.
Styling Tip: Check for lash visibility before finishing. With hooded eyes, adjust placement slightly higher on the lash line to make sure extensions are still visible when the eyes are open.
6. Round or Protruding Eyes – Elongate with Horizontal Lines
Clients with large, round, or protruding eyes often benefit from styles that add horizontal balance. A Cat Eye Map is ideal for this shape because it draws the eye outward and softens the roundness. Stick with B and C curls, which won’t exaggerate the curve. Increase length gradually from the inner to outer corners, and avoid high volume in the center.
Styling Tip: Keep the lash line consistent and avoid using spike lashes in the middle. Taper the outer edge slowly and use flat lashes for a sleeker silhouette.

0.15MM Ellipse Flat Classic Eyelash Extensions
LENGTH: MIXED 8-15MM
CURL: C

Pro Lash Mapping Tips to Nail the Perfect Style Every Time
Technique is essential, but great lash styling starts with clear communication. Every client walks in with different expectations, eye shapes, and lash conditions. The more you listen and observe before you start, the easier it becomes to design a set that fits both their natural features and their personal style. Here are some key tips to help you create confident, well-planned lash maps that deliver beautiful, long-lasting results.
- Take 5–10 Minutes for a Proper Consultation: Before touching a single lash, spend a few minutes talking with your client. Ask about their preferred look—natural, dramatic, lifted, wispy—and check if they have any concerns, like sensitivity or poor retention in the past. This step builds trust and sets the foundation for a tailored design.
- Check Lash Direction, Natural Curl, and Lash Health: Lashes can grow straight, upward, downward, or even sideways. The direction and strength of each client’s natural lashes will affect how extensions sit and how long they last. Weak, sparse, or damaged lashes also limit how much length or volume you can safely apply.
- Ask What They Want Before You Suggest Anything: Let your client speak first. You might notice a specific eye shape or lash condition, but it’s important to hear what they want out of the session. Sometimes, a client prefers a bold look even if it’s not the most balanced for their eye shape—and that’s okay.
- Balance Style Requests with What’s Technically Suitable: Even if a client wants a dramatic cat eye, it won’t look flattering on every face. Use your expertise to gently adjust the lash map so that it enhances their natural features while still giving them the effect they want.
- Use Mapping Stickers or Digital Tools for Precision: Mapping tools help you apply lashes consistently, especially during full volume or hybrid sets. Stickers, pens, and even digital apps let you plan each zone clearly, so there’s no guesswork once you begin.
Common Lash Styling Mistakes to Avoid
Even experienced lash artists can fall into habits that lead to less-than-ideal results. Whether it's rushing through the mapping stage or overlooking key client features, small missteps can affect the comfort, retention, and overall appearance of a set. Avoiding these common lash extension mistakes will help you deliver more consistent, flattering results—and keep clients coming back.
Using the Same Lash Map for Every Eye Shape
It might save time to rely on one go-to lash map, but doing so can lead to poor symmetry, uneven lift, or a style that doesn’t suit the client’s face. Every eye shape responds differently to the same curl and length combination.
Pro Tip: Create at least 3–5 standard maps for different eye types (e.g., doll, cat, reverse cat, kitten, and open-eye) and adjust them as needed during consultation.

Overlooking Natural Lash Direction and Density
Lashes that grow downward or sideways won’t hold high curls the same way upward-facing lashes do. Similarly, applying thick or long extensions to weak or sparse lashes can cause poor retention or early shedding.
Pro Tip: During prep, take time to identify areas with sparse growth or unusual direction. Adjust curl and weight per zone so that the set looks even and stays in place longer.
Using Extreme Curls on Hooded or Deep-Set Eyes
Extreme curls like D or L can be dramatic in appearance, but they have a tendency to curl onto the lid on hooded or deep-set clients. It is uncomfortable, can ruin the appearance, and is a cause of faster lash wear-off due to friction on the lid.
Pro Tip: Employ softer curls like B or C in sensitive regions. Inspect lash curl visually with eyes open first, prior to applying the full set.

Extending Too Far on Downturned or Wide-Set Eyes
Adding lashes at the outer corners may be tempting, but on wide-set or downturned eyes, this increases the distance or drop. Instead of opening up the eye, it can give the shape a pulled-down or too-widened look.
Pro Tip: Position your longest lengths just short of the outer corner and then taper off. This opens and centers the eyes without stretching or pulling the shape.
Lash Extension Styling Tips That Actually Work for Real Eye Shapes
You don’t need 20 lash maps—you just need the right one for each face. Understanding what works for different eye shapes and lash directions takes time, but it’s what sets great artists apart. Stick to smart mapping, trust your eye, and let your client’s features lead the design. As you keep learning, your lash sets will only get better.
Lash Styling FAQ for Eye Shapes
Q1: Which is the most popular lash map for beginners?
A soft curl, such as C or CC on a Doll's Eye map, for instance, is a great starting point. It suits most eye shapes and creates a lifted, open appearance without being overly dramatic.
Q2: How do I tell if I am using the wrong curl?
If the lashes penetrate the eyelid, are bothersome, or are too dramatic for the client's eyes, the curl is likely too strong. Attempt to use a softer curl or placement to work more in sync with the shape of the eye.
Q3: Can lash extensions correct uneven eyes?
Yes, asymmetrical eyes can be visually balanced with proper lash mapping. Apply varying lengths or types of curls on each side to counterbalance the shape and create the illusion of more symmetrical eyes.
Q4: Do lash artists ever blend curl types?
Definitely. Mixing curls can assist you in achieving smooth transitions, particularly for clients who have challenging eye shapes such as hooded or downturned eyes. Ensure the transition is not visible so that the end result is still blended.
Q5: What is the best lash map for a natural look?
A Kitten Eye with shorter lengths and soft C curls provides a subtle lift that still resembles your client's own lashes—only better. It's an ideal option for clients who desire something understated and enhanced.
Leave a comment